 |
|
|
|
Raspberry Pi Zumo Robot
This page provides videos, related diagrams, and links to relevant Python code, that I used to build a Raspberry Pi robot based on a "Zumo" chasis. This said, the very first video is all about using the GPIO pins on a Raspberry Pi, an undertanding of which is necessary to provide a solid foundation for the rest of the project.
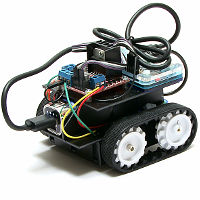
Raspberry Pi Robotics #1: GPIO ControlThe above video explains how to connect LEDs to a Raspberry Pi's general purpose input-output (GPIO) pins, and how to write Python code to turn them on and off. You can discuss this video on YouTube. The wiring diagram included in the video is here: 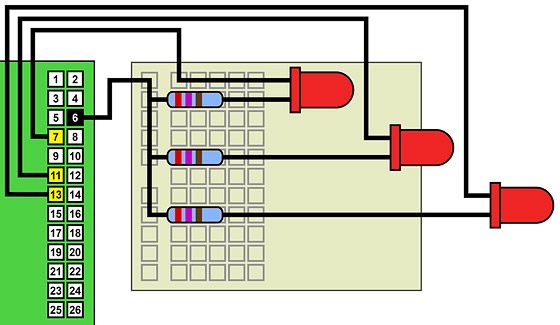 Raspberry Pi Robotics #2: Zumo RobotThis second video shows how to construct a Pololu Zumo robot chassis, how interface it to a Raspberry Pi using an L298N H-bridge motor controller, and how to use Python code to bring the robot to life! You can discuss this video on YouTube. The micro metal gear motors used in the video are available from Pimoroni here, or from Pololu here. Pololu Zumo chassis kit is available from Pimoroni here, or from Pololu here. Male-to-male and male-to-female jumper leads are available from Pimoroni here, and from lots of other places! For the "L298N H-Bridge Motor Controller", search for that term on Amazon or eBay. As of November 19 2016, one option on Amazon.com is here, and on Amazon.co.uk here. The wiring diagram included in the video is here:  IMPORTANT NOTE Raspberry Pi Robotics #3: Keyboard ControlThis third video shows how to mount a Raspberry Pi Zero, the L298N motor controller and a USB power bank on the Zumo robot from the above video, and then how to control the resultant independent robot via a Rii wireless keyboard by using the curses module in Python. You can discuss this video on YouTube. The Python code that I use in this video can be downloaded here:
Raspberry Pi Robotics #4: SSH Network ControlThis fourth video shows how to control the robot over a network using a laptop or even an Android tablet. No new code is required. Raspberry Pi Robotics #5: Line FollowerThis fifth video shows how to fit Adafruit reflectance sensors to the robot so that it can follow a line. The sensors are available in the US from Adafruit, and in the UK from Pimononi. The wiring diagram included in the video is as below. Note that you can learn more about Raspberry Pi GPIO inputs and using this reflectance sensor in my video on Raspberry Pi GPIO Inputs: 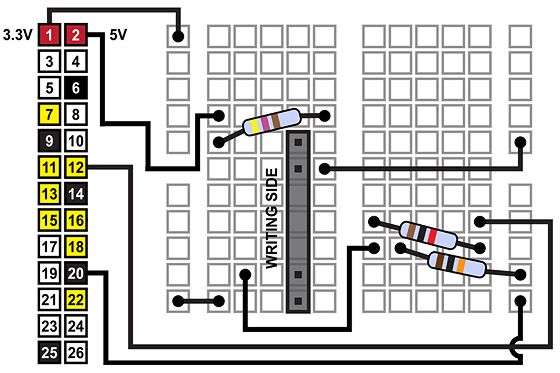 For the final robot, the above wiring needs to be duplicated for the second sensor, with the second sensor connected to GPIO pin 16, rather than 12. The Python code that I use in this video can be downloaded here:
Return to: Videos Homepage.
|
 |
|
| ||