 |
|
|
|
Raspberry Pi Devastator Robot
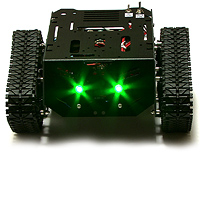
This project involves building a robot using a Raspberry Pi Zero W and the Devastator Tank Mobile Platform from DFRobot There our currently four videos in this series, the first of which is as below. Please note that on October 30th 2021, a new version of Raspberry Pi OS was released known as "Bullseye". This has new camera drivers that are not compatible with the Python camera code linked below and included in this video series, or indeed any Python camera code written by anybody before November 2021! If you are running the version of Raspberry Pi OS known as "Buster", or an earlier version, things should work just fine. I discuss the matter in depth in this video. EPISODE ONEThe basic setup for the robot in the first episode -- in terms of the motor controller wiring and the initial Python control code -- are the same as in my Raspberry Pi Zumo Robot build, for which information is available here. EPISODE TWOIn the second video in the series, I expand on the code and wiring diagram, which by the end of the episode are as follows: 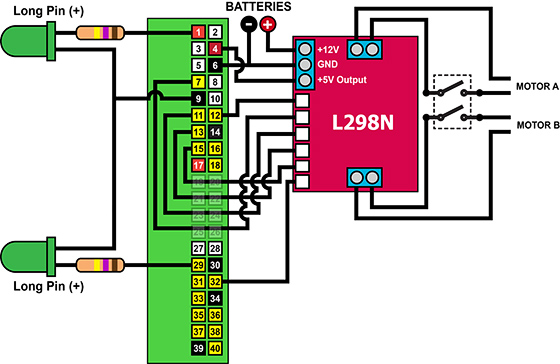 EPISODE THREEIn the third part of the series I add a camera using a custom bracket that I designed in Tinkercad and 3D printed online using 3DHubs. The additional code for camera control, and to demonstrate camera control, are as follows:
Note that the file above named "dev_robot_camera.py" needs to be renamed to "dev_robot.py" to be used with the robot (which is what it was called in the video), as this is the file that bootup.sh autoruns. However, I could not call it "dev_robot.py" here, as that file is available under video two above! :) You can download the STL file for the bracket from Thingiverse, or access (and modify) the design on Tinkercad -- or just search on Tinkercad for "explainingcomputers". EPISODE FOURIn the fourth episode, I improve the keyboard control code (so that the robot only moves when a key is held down), as well as implementing PWM speed control. During the episode, the wiring diagram and code progress as below. Once again, note that the robot's control code as linked below needs to be renamed to "dev_robot.py" (which is what it was called in the video), as this is the file that bootup.sh autoruns.
Return to: Videos Homepage.
|
 |
|
| ||