 |
|
|
|
Raspberry Pi Pico W Weather Station
You can ask questions and discuss this project on YouTube here. The next video in this series is here. The final code used in the video can be downloaded here. Please note that some people have experienced problems downloading this Python file in Firefox, and I have confirmed that it only works in other browsers (I've tested Chrome, Chromium and Edge). If you have this problem, download this zip file, inside which is the Python file. Pragmatic solution!
Note that the above code will need to be renamed to main.py if you wish it to automatically execute when the Pico is powered up. Also note that this code will not work until you have installed the BME280 MicroPython library on the Pico W as shown in the video. In the code, you will need to enter your own SSID (network name) and WiFi password in the appropriate lines. Note that these are entered within the single quotes. So, for example, if your network name is Michelle, change the ssid line to read ssid = 'Michelle'. The wiring diagram for connecting the BME280 to the Pico is as follows: 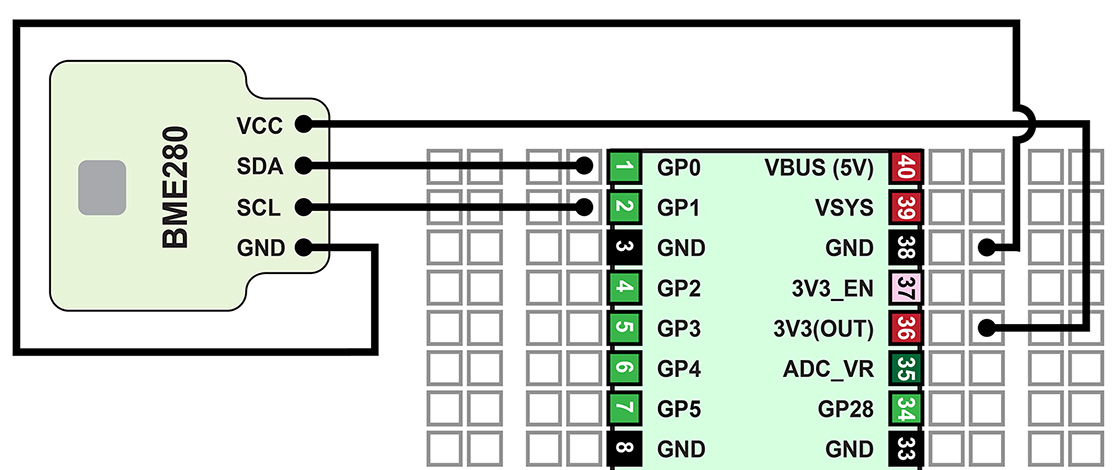 Note that "VCC" may be labeled something else on your BME280 board -- such as "VIN" (voltage in), "+", "2-6V", etc. Basically VCC is the power input to the board. Return to: Videos Homepage.
|
 |
|
| ||